Tools and Materials You Need
Like any home improvement project, the success of your drywall installation starts with gathering the right tools and materials. Here’s what you need.
Required Tools
The following tools and equipment are essential for drywalling:
• Tape Measure
• Drywall Square
• Utility Knife
• Cordless Drill
• Hammer
Additional tools/equipment you might need include a step ladder, safety equipment (such as eye protection), and a jab saw or drywall circle cutter to cut in HVAC vents, electrical outlets, light switches, and the like.
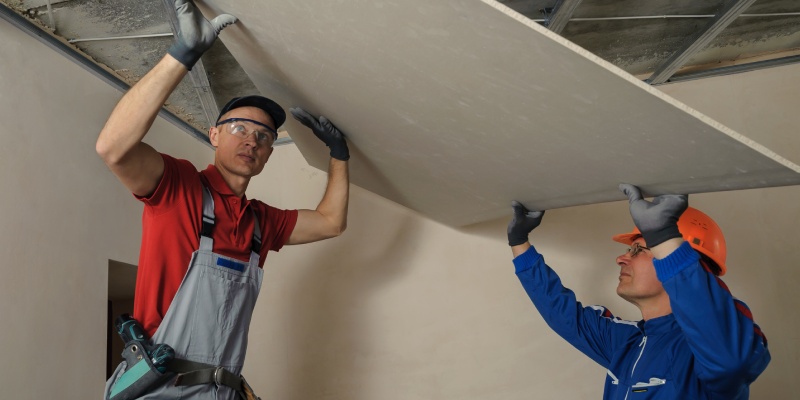
If you’re installing drywall completely solo (rather than with a helper, which we strongly recommend), a drywall lift is extremely helpful, especially when drywalling a ceiling.
Required Materials
Here are the materials you’ll need to hang drywall:
Sheets of Drywall
Drywall Fasteners (Screws or Nails)
Drywall Shims & Wood Glue
Once again, remember, that this materials list is for hanging drywall – mudding and finishing drywall requires additional materials.
A Note on Drywall Screws
You have two main types of drywall fasteners to choose from – screws and nails.
Drywall screws are typically the best choice. Not only do screws have vastly superior holding strength, but they’re also much easier to remove if you do ever need to remove or replace a drywall sheet.
Each of the four types of drywall screws serves a slightly different purpose, so make sure to select the best ones for your project:
• Coarse Screws – The coarse threads better help secure the drywall panels to the wall studs.
• Fine Screws – Best for securing drywall panels to metal studs. The screw heads are usually smaller.
• Self-Drilling Screws – Ideal for securing drywall to metal studs or metal frames.
• Trim-Head Screws – Not for attaching drywall to studs. Instead, to attach wood trim to drywall boards as a finishing touch.
It’s just as important to select the proper length of screws. The screws should be slightly longer than the drywall panels are thick.
For example, use 1-1/4 inch or 1-3/8 inch drywall screws for 1/2 inch panels and 1-3/8 inch or 1-5/8 inch drywall screws for 5/8 inch panels.
The same measurements apply if you’re using nails instead of screws. If using nails, make sure to select ring-shank drywall nails for extra strength.
How to Hang Drywall By Yourself
Hanging drywall is a lot easier with a partner. So, before starting your project, track down a helper if at all possible.
Prepare Your Walls
Start by first preparing the room for drywalling.
You’re likely working with the room’s skeleton, so preparation consists mainly of protecting electrical wires and plumbing lines.
Nail protector plates are a cheap and easy way to ensure you won’t accidentally damage your utility lines.
Measure the Drywall
“Measure twice, cut once.”
This age-old carpentry rule of thumb definitely applies to measuring and cutting drywall.
In general, cutting drywall slightly too small is better than slightly too large as excess drywall is prone to cracking and fraying at the edges if you try to force it in like a jigsaw puzzle.
Cut the Drywall
Scoring and snapping is the best method to cut larger pieces of drywall for hanging.
Use your utility knife and drywall square to score the top of each drywall sheet. A level or long straight board helps make straighter cuts.
After you’ve scored the drywall, snap it and fold it open to split. Cut through the paper with the utility knife to finish the cut.
Inspect the Wall Studs
If you’re lucky, all of your studs and joists will be relatively flat.
Inspect them before hanging the drywall with a visual inspection (you can double check this with a long, straight board).
Trim any studs or joists that stick out and use a drywall shim (attach with glue) for any sections that are too low.
The straighter the studs and joists, the flatter and more even your new drywall will lay.
Start with the Ceiling (If Applicable)
Always start on top when installing new drywall.
So, this means that if you’re drywalling the ceiling, start hanging panels on the ceiling first.
For ceilings, use drywall screws every 12 inches. Make sure you drill them into the ceiling joists.
Use additional screws where tapered edges meet. Space them every 8 inches, but stay 3/8 inches from the edge to prevent damages.
Hang the Wall Panels
Now that the ceiling is finished, it’s time to hang the wall panels.
Start with the top sheet first. It’s best to always hang drywall horizontally for home installation.
Mark where each stud is located with a pencil. Use your drywall lifter or the help of a partner to lift each panel into place. Drive screws every 16 inches to securely fasten the drywall panel to the wall studs.


Leave a Reply